2.2 - ***For US Users ONLY***
Client Intake
Preferred Client Search
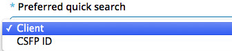
You can now select if you want your main client search to by by client information or CSFP ID. Change your user profile preferences to set this setting.
You can access your profile two ways:
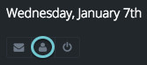
Click on the "Profile" button underneath the date on the left sidebar.

Click on your name on the top right of the page; click on "Profile".
Locate the "Preferred quick search" section. Choose from the drop-down list what search option you would prefer when searching for a client's profile.- Click on the "Save"
 button to save changes or "Cancel"
  to discard the changes.
Reports
CSFP: Ethnicity Report (Unique)
This report shows a table and two sets of graphs. It reports on ethnicities of clients served during the reporting period. See /wiki/spaces/UserManual/pages/25756005 for more information on how to create this report.
Table

- The light blue heading represents the title of the section that was chosen to be reported on.
- The dark blue heading describes the section.
- The list items appear on the leftmost column and the totals for each organization are listed in sequential columns.
- The rightmost column will be the total of all columns combined
Graph
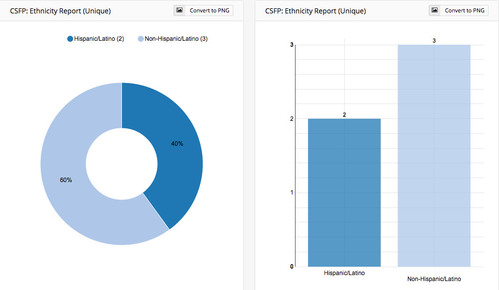
The first set of graphs show a report between Hispanic/Latino clients and Non-Hispanic/Latino Clients
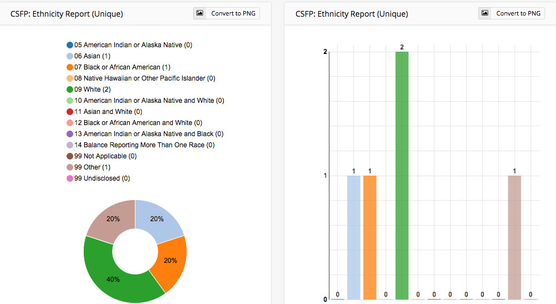
The second set reports on all ethnicities.
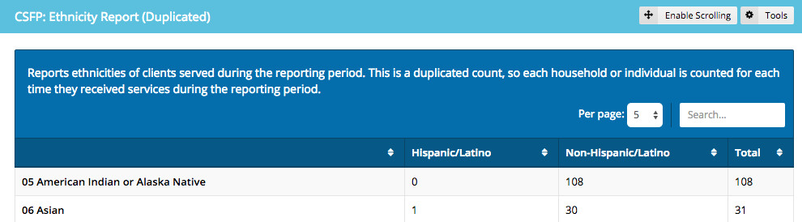
CSFP: Ethnicity Report (Duplicated)
This report shows a table and two sets of graphs. It reports on ethnicities of clients served during the reporting period. See /wiki/spaces/UserManual/pages/25756049 for more information on how to create this report.
Table
Graph
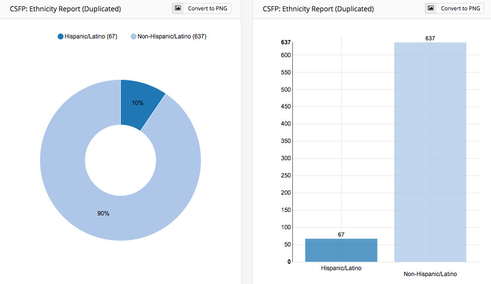
The first set of graphs show a report between Hispanic/Latino clients and Non-Hispanic/Latino Clients
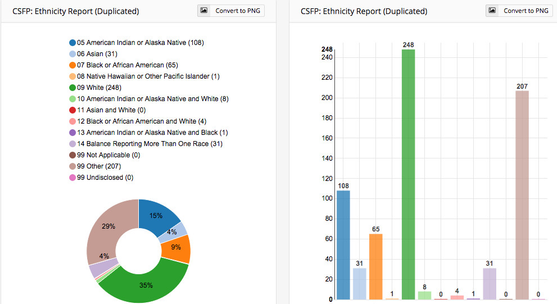
The second set reports on all ethnicities.
Permissions
Please note that since these are new reports, you will have to go to your User profile in order to grant yourself access to run them. Please refer to /wiki/spaces/UserManual/pages/10190993 for instructions on how to do this.
Administration
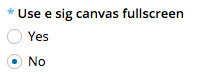
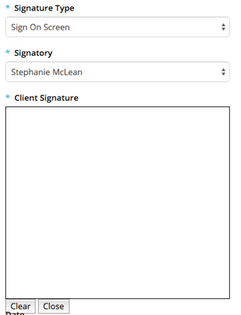
Optional eSignature Canvas Open Full Screen
When recording eSignatures, "Sign On Screen" is an option. When selected, a blank screen usually appears to cover the entire page. An option is now available to have a small white box on the screen for an eSignature instead. To make this change, go to Organizations, then find your Distribution Network. Click on the "Edit" icon beside it and scroll down to "Use e sig canvas fullscreen". It's selected "Yes" by default. Change it to "No" and save your changes.